How you can save filters for future use and easier data analysis
In this article, we will show how to save your filters for future use
info
- Currently this feature is in beta, and once is stable we will expand this functionality and apply to more pages!
What are saved filters?
- You can create Filters and save them with any name you want so you can easily use them in the future.
- This is particularly useful when you want to organize your data and not having to select a specific set of filters every time you want to analyze your data.
warning
- These filters will save your current selection of filters except your selected date range. This is to allow you to apply your filters to any date range you want!
Steps
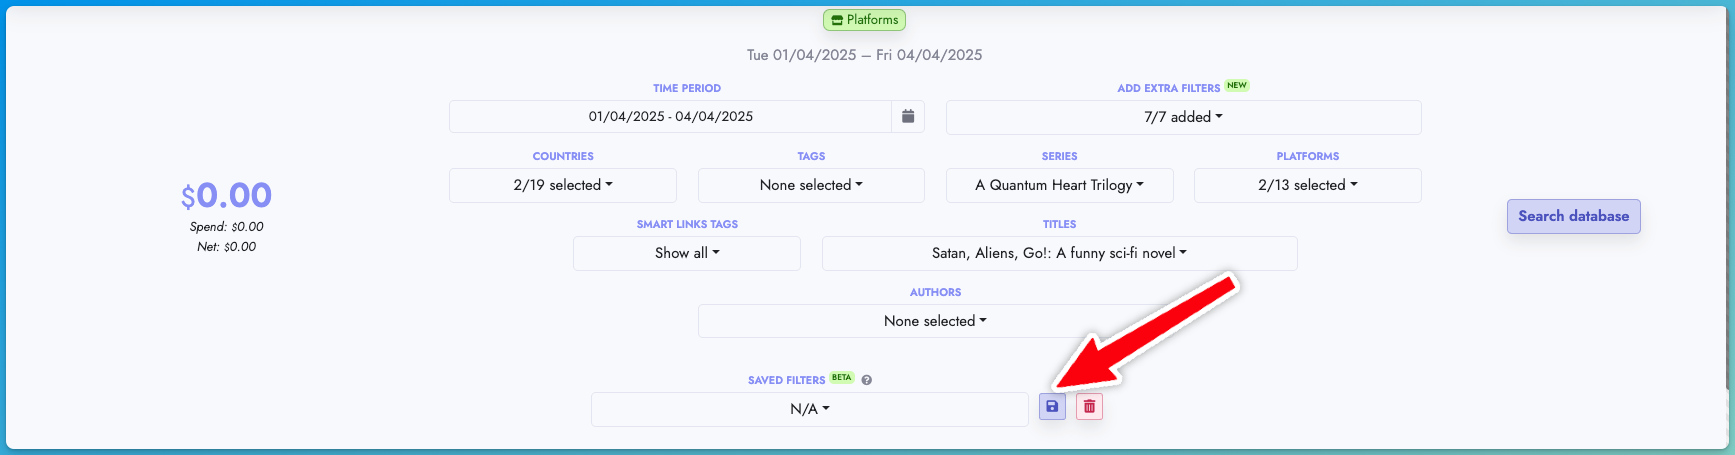
- Select the filters you want to apply and then hit the save button
- Look for the "Saved Filters" section on your page
- You can find this dropdown in our Dashboards -> Visual page (we will add this feature to more pages soon).
- Look for the "Saved Filters" section on your page
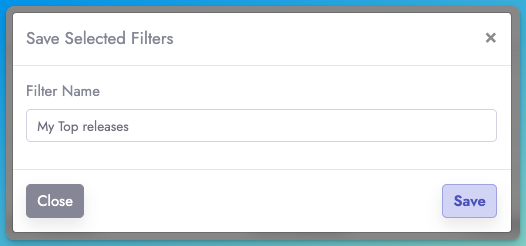
- After clicking the saved button, you will be prompt to enter a name for your filter so you can easily identify it.
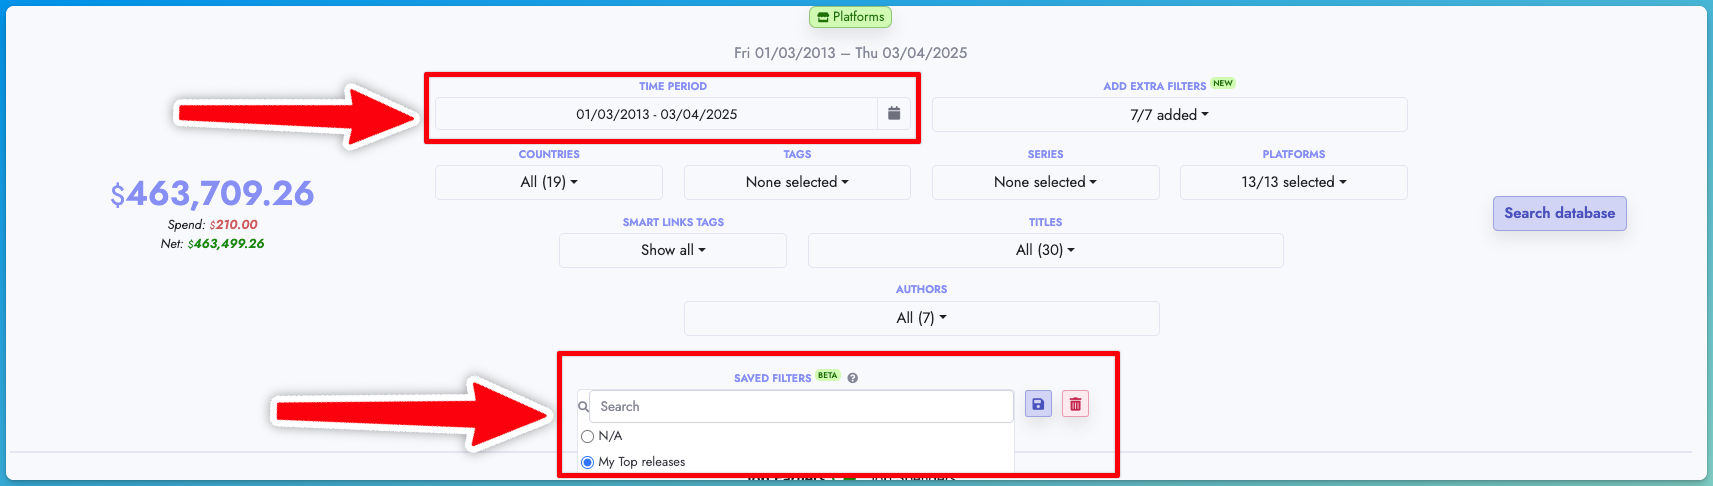
- After you save your filter, you can select any time period you want, and then select the filter you want to apply from the "Saved Filters" dropdown
Deleting an existing filter
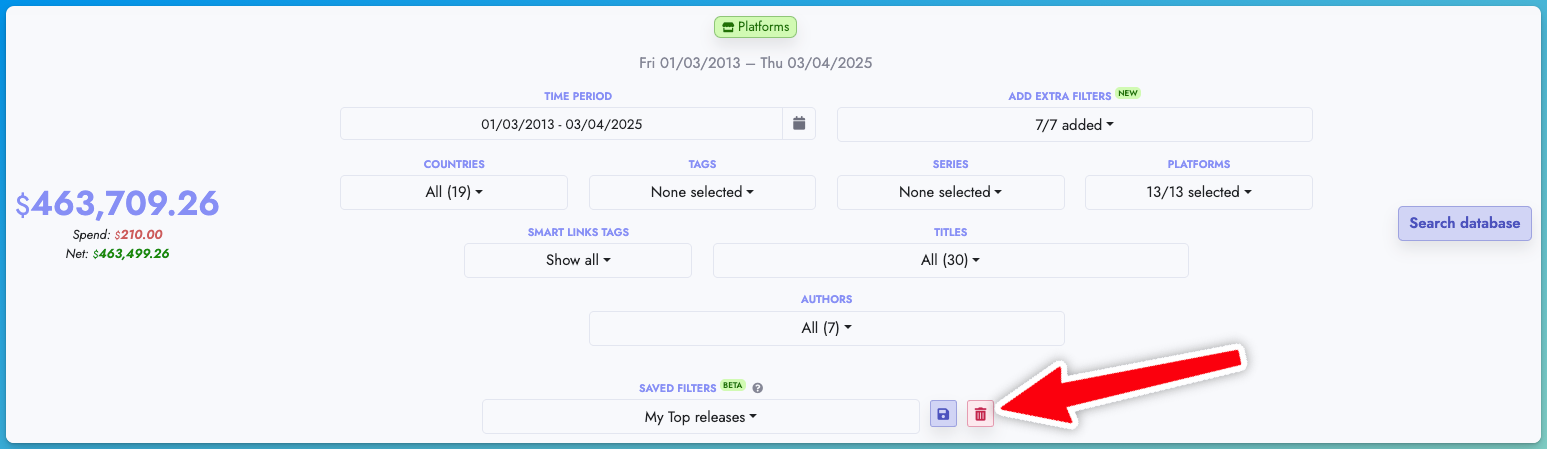
If you created a filter that you no longer need, you can just click the red bin button to delete it
info
- You can create as many filters as you want! There are no limits!